


ベトナム語バージョン:https://vtitech.vn/tao-project-rails-6-voi-postgressql-11-bang-docker/
皆さん、こんにちは!クアンです。
この投稿は、Docker+PostgresSQL 11+Rails 6の新しいプロジェクトを作成方法です。よろしくお願いします。
Dockerの準備
まず、Dockerfileを作って、下のコードを書いてください:
FROM ruby:2.7
RUN apt-get update -qq && apt-get install -y nodejs postgresql-client npm\
  && rm -rf /var/lib/apt/lists/* \
  && curl -o- -L https://yarnpkg.com/install.sh | bash
RUN mkdir /myapp
WORKDIR /myapp
COPY Gemfile /myapp/Gemfile
COPY Gemfile.lock /myapp/Gemfile.lock
RUN bundle install
# yarnをインストールする
RUN npm install -g yarn
RUN yarn install --check-files

COPY . /myapp

# コンテナが起動するたびに実行されるスクリプトを追加します。
COPY entrypoint.sh /usr/bin/
RUN chmod +x /usr/bin/entrypoint.sh
ENTRYPOINT ["entrypoint.sh"]
EXPOSE 3000

# メインプロセスを開始します。
CMD ["rails", "server", "-b", "0.0.0.0"]次は、Gemfileを作ります。Gemfileの内容は:
source 'https://rubygems.org'
gem 'rails', '~>6そして、空きGemfile.lockを作ります。
touch Gemfile.lockentrypoint.shを作ります。
#!/bin/bash
set -e

# Remove a potentially pre-existing server.pid for Rails.
rm -f /myapp/tmp/pids/server.pid

# Then exec the container's main process (what's set as CMD in the Dockerfile).
exec "$@"最後に、docker-compose.ymlを作ります。
version: '3'

services:
  db:
    image: postgres:11
    environment:
      POSTGRES_HOST_AUTH_METHOD: 'trust'
    volumes:
      - ./tmp/db:/var/lib/postgresql/data
  web:
    build: .
    command: bash -c "rm -f tmp/pids/server.pid && bundle exec rails s -p 3000 -b '0.0.0.0'"
    volumes:
      - .:/myapp
    ports:
      - "3000:3000"
    depends_on:
      - db
プロジェクトイニシャルのコマンドを実行
docker-compose run web rails new . --force --no-deps --database=postgresql --webpack新しいアプリは生成されました!
shellで生成したファイルを確認しましょう。
$ ls -l
total 736
-rw-r--r--    1 quanhoang  staff     605 Sep 28 11:19 Dockerfile
-rw-r--r--    1 quanhoang  staff    1971 Sep 28 15:11 Gemfile
-rw-r--r--    1 quanhoang  staff    5537 Sep 28 15:11 Gemfile.lock
-rw-r--r--    1 quanhoang  staff     374 Sep 28 15:11 README.md
-rw-r--r--    1 quanhoang  staff     227 Sep 28 15:11 Rakefile
drwxr-xr-x   11 quanhoang  staff     352 Sep 28 15:11 app
-rw-r--r--    1 quanhoang  staff    1876 Sep 28 15:11 babel.config.js
drwxr-xr-x   10 quanhoang  staff     320 Sep 28 15:11 bin
drwxr-xr-x   18 quanhoang  staff     576 Sep 28 15:11 config
-rw-r--r--    1 quanhoang  staff     130 Sep 28 15:11 config.ru
drwxr-xr-x    3 quanhoang  staff      96 Sep 28 15:11 db
-rw-r--r--    1 quanhoang  staff     309 Sep 28 15:14 docker-compose.yml
-rw-r--r--    1 quanhoang  staff     202 Sep 27 15:32 entrypoint.sh
drwxr-xr-x    4 quanhoang  staff     128 Sep 28 15:11 lib
drwxr-xr-x    4 quanhoang  staff     128 Sep 28 15:11 log
drwxr-xr-x  762 quanhoang  staff   24384 Sep 28 15:14 node_modules
-rw-r--r--    1 quanhoang  staff     332 Sep 28 15:14 package.json
-rw-r--r--    1 quanhoang  staff     224 Sep 28 15:11 postcss.config.js
drwxr-xr-x    9 quanhoang  staff     288 Sep 28 15:11 public
drwxr-xr-x    3 quanhoang  staff      96 Sep 28 15:11 storage
drwxr-xr-x   12 quanhoang  staff     384 Sep 28 15:11 test
drwxr-xr-x    7 quanhoang  staff     224 Sep 28 15:11 tmp
drwxr-xr-x    3 quanhoang  staff      96 Sep 28 15:11 vendor
-rw-r--r--    1 quanhoang  staff  310152 Sep 28 15:14 yarn.lock
LinuxでDockerを使う場合、上のファイルはrootのロールしか処理できないので、このコマンドを実行しなければなりません。
sudo chown -R $USER:$USER .最後にbuildコマンドを実行
docker-compose buildデータベースと繋がる
config/database.ymlは、少し修正されます。
default: &default
  adapter: postgresql
  encoding: unicode
  host: db
  username: postgres
  password:
  pool: 5

development:
  <<: *default
  database: myapp_development

test:
  <<: *default
  database: myapp_test
アプリをスタート
$ docker-compose upOKのことは、shellに下のような結果を表示する
myapp_db_1 is up-to-date
Creating myapp_web_1 ... done
Attaching to myapp_db_1, myapp_web_1
db_1   | The files belonging to this database system will be owned by user "postgres".
db_1   | This user must also own the server process.
新しいターミナルを開いて、下のコマンドを実行する
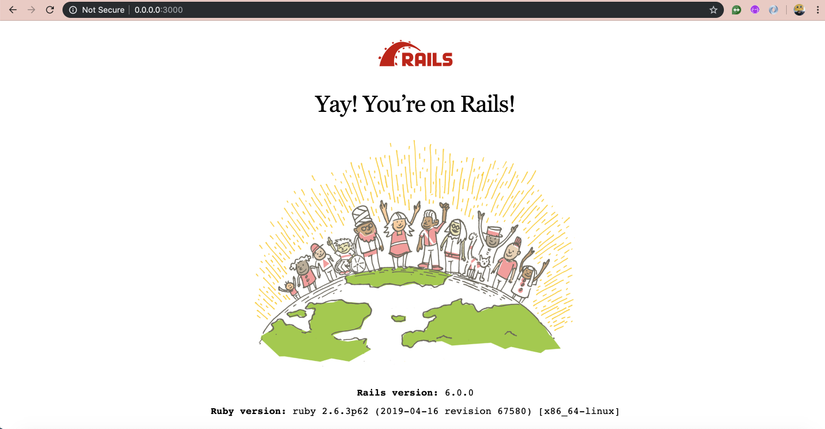
docker-compose run web rails db:createhttp://localhost:3000をアクセスして、今ウェルカムページを見えます。
最後に
アプリを閉じること、docker-compose downを実行してください。
この投稿は、 https://docs.docker.com/compose/rails/ を参考して、Rails 6のプロジェクトを作るために修正します。


Vui lòng đăng nhập để bình luận.